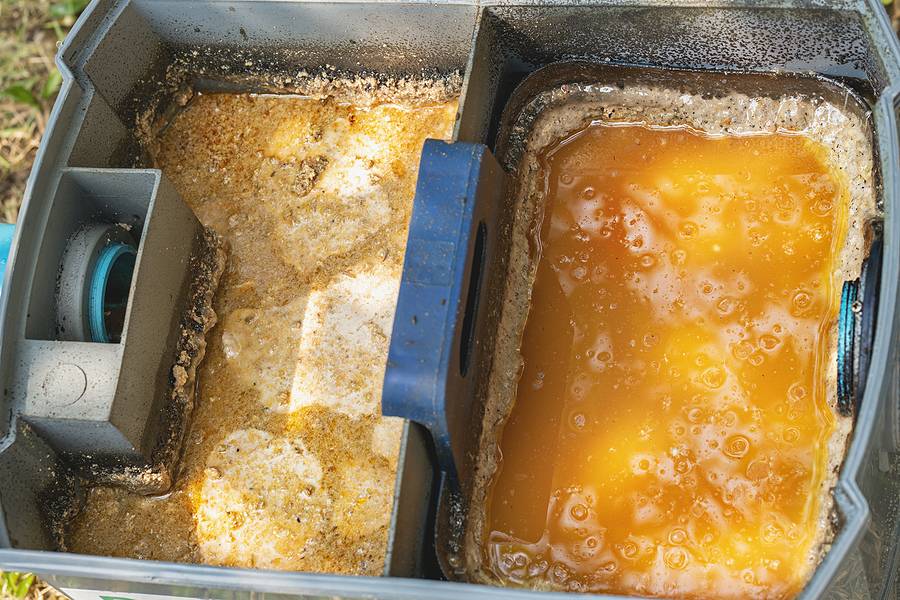
How to Clean Grease Traps for Restaurants
Neglecting your grease trap can lead to bad smells, slow drains, and even health code violations. At Rooter Hero, we know that regular grease trap maintenance contributes to the efficiency of your restaurant. Keep reading to learn a detailed, yet easy-to-follow, 12-step process for cleaning grease traps so you can avoid an urgent plumbing service.
Preparing for the Task
Before you begin the cleaning process, you’ll need to gather the appropriate tools. You’ll need rubber gloves, safety goggles, a face mask, a wrench, a bucket, a scraper, a shop vacuum, and dish soap. Having these items on hand will make the process easier and safer, by minimizing the risk of injury or contamination.
Power Down
To start, make sure all kitchen equipment connected to the grease trap is turned off. This step prevents any hot water, food, or grease from entering the trap while you’re cleaning. It also ensures the safety of anyone performing the task, as electrical or gas-powered equipment can pose a hazard if not properly managed.
Find the Grease Trap
Next, identify the location of your grease trap. In most restaurants, grease traps are located either under the sink or in the floor near the sink area. Knowing the exact location is key to accessing the area and cleaning it efficiently. If you’re unsure where your grease trap is, check your kitchen’s blueprints or contact a plumber in San Francisco for assistance.
Is Professional Help Required?
Before you proceed, take a moment to decide whether the job is something you can handle on your own. If the grease trap is particularly large or hasn’t been cleaned in a while, it might be best to call a professional. A plumbing company can provide thorough cleaning and inspect the system for any underlying issues that might not be obvious.
Scrape Off the Top
Once you’ve determined that it’s safe to proceed, start by removing the solidified grease from the top of the trap. Use a scraper or a similar tool to gently lift the hardened grease out of the trap. This step is important because it prevents clogs and ensures that the grease trap can function effectively. Be sure to place the removed grease into a bucket for proper disposal later.
Empty the Trap
After scraping off the solidified grease, the next step is to empty the grease trap. Use a bucket to remove any liquid and sludge from the trap. If there’s a lot of waste, you might want to use a shop vacuum to speed up the process. Properly disposing of this waste is a priority, as improper disposal could lead to environmental damage and potential fines.
Deep Clean
With the trap emptied, it’s time to clean the interior. Dish soap and warm water can be used to scrub the inside of the grease trap thoroughly. This step helps remove any residual grease and prevents future build-up. A clean trap functions better and reduces the likelihood of odors and plumbing issues.
Inspect and Replace Worn Parts
While you’re cleaning, take the opportunity to inspect the grease trap for signs of wear. Look for cracks, rust, or any other damage that might affect its performance. If you notice any issues, it’s best to replace the damaged parts immediately. Neglecting to do so could result in more severe problems that requires an emergency plumbing repair service.
Reassembly
Once you’ve finished cleaning and inspecting the trap, it’s time to reassemble it. Carefully replace all the components and make sure that everything is securely in place. Double-check that the grease trap is properly sealed to prevent leaks. Proper reassembly is needed for the grease trap to function correctly and to avoid future plumbing problems.
Proper Disposal
After cleaning, the waste you’ve collected needs to be disposed of responsibly. Don’t pour grease down the drain, as it can cause serious plumbing issues. Instead, dispose of it according to your local regulations, which may involve taking it to a recycling center or arranging for a specialized disposal service.
Keeping Track of Maintenance
Once the cleaning process is complete, jot down the date in a maintenance log. Regular documentation helps ensure that grease traps are cleaned on schedule, which prevents build-up and potential plumbing issues. Keeping track of maintenance also provides valuable records if you ever need to demonstrate compliance with health and safety regulations.
Power Up
Finally, once everything is cleaned, reassembled, and documented, turn your kitchen equipment back on. Check that everything is functioning properly and that the grease trap is effectively doing its job. Regular maintenance like this helps keep your kitchen running smoothly and reduces the likelihood of needing emergency services from local plumbers.
Do You Need a Maintenance or Plumbing Repair Service for Your Kitchen?
Cleaning grease traps might not be the most glamorous task in a restaurant, but it’s an important one. If you find think the task is challenging or notice any issues that require professional attention, reach out to Rooter Hero for a professional plumbing service. Our qualified plumbers are ready to help make sure that your restaurant stays compliant with health regulations. Are you ready to be free from plumbing headaches? Contact us today to schedule your appointment.